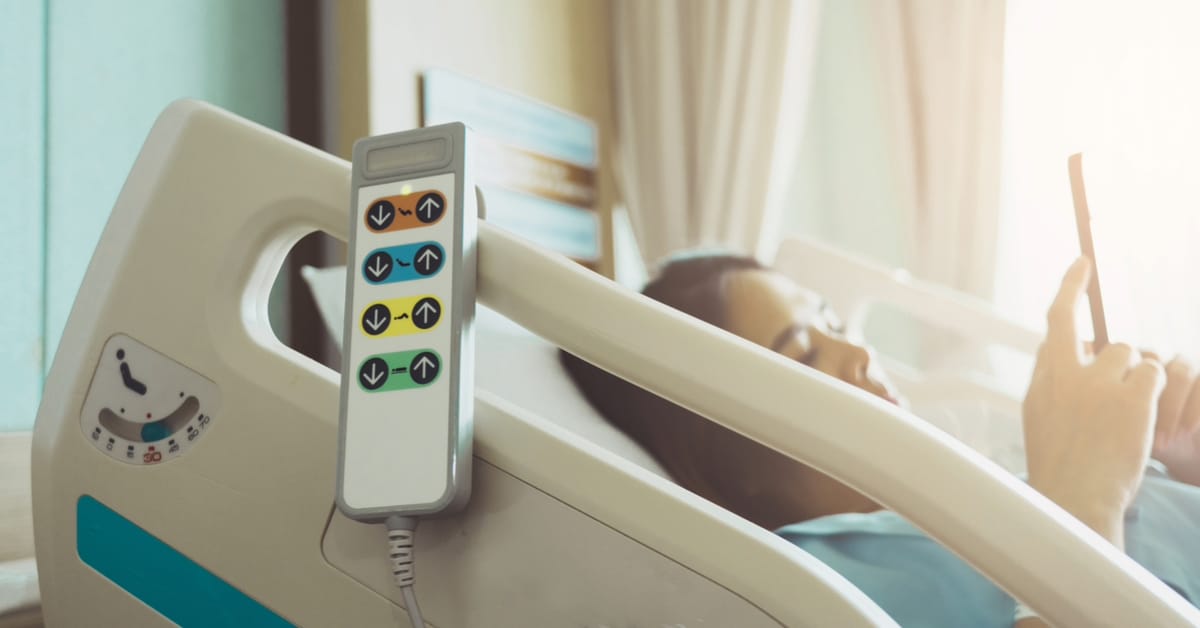
In this post, I will delve into the significance of different patient positions in bed, go over some of the common nursing patient positions you’ll see in clinical rotations and later on the job, and give a few cases of when you would use each position.
Why Are Different Patient Positions Important?
So why is this important enough to write an entire guide about? Well, understanding patient positions is crucial because it directly impacts patient care and well-being. There are four main ways patient positioning influences patient care:
- Ensuring optimal care: Proper patient positioning helps prevent pressure ulcers, respiratory issues, and musculoskeletal complications, particularly for patients with limited mobility. If you have an immobile patient, ensuring they are turned into a variety of positions can make a huge difference in their health status and outcome.
- Facilitating procedures: Accurate patient positioning enables healthcare providers to access specific body areas properly with good visualization, making medical procedures more efficient and successful. For instance, if a patient is not in a specific position for certain procedures, you could run the risk of contaminating a sterile field.
- Promoting comfort and dignity: When patients are appropriately positioned, they will be more comfortable, especially during hands-on care or procedures. This comfort furthers their trust in their care team and will help to protect your client’s sense of dignity with proper draping.
- Enhancing safety: By placing patients in the right position, you can minimize the risk of falls and injuries, especially in patients with mobility challenges.
Let’s go through some of the most common patient positions that you need to be familiar with as a nursing student and their uses. It’s critical to remember that before positioning your patient, you always ensure the bed is in its lowest position, the wheels are locked, and you’ve explained to your patient what you are about to do.
Supine Position
The supine position is where the patient is lying flat on their back with their face toward the ceiling. Typically, the arms are laid relaxed at the sides and the legs are resting in their natural position. Occasionally, pillows may be used for added support or more specific positioning in the supine position.
Supine is a widely used patient position for examinations, in post-operative recovery, and during procedures. Here are some more specific examples where you might see the supine position applied:
- Examinations: General physical exams, neurological assessments, and cardiac assessments are often performed with the patient in the supine position.
- Postoperative care: After surgery, patients are often placed in a supine position to monitor their vital signs and, sometimes, to minimize movement depending on the surgery.
- Invasive procedures: Procedures such as central line insertion or percutaneous kidney stone removal typically require the supine position.
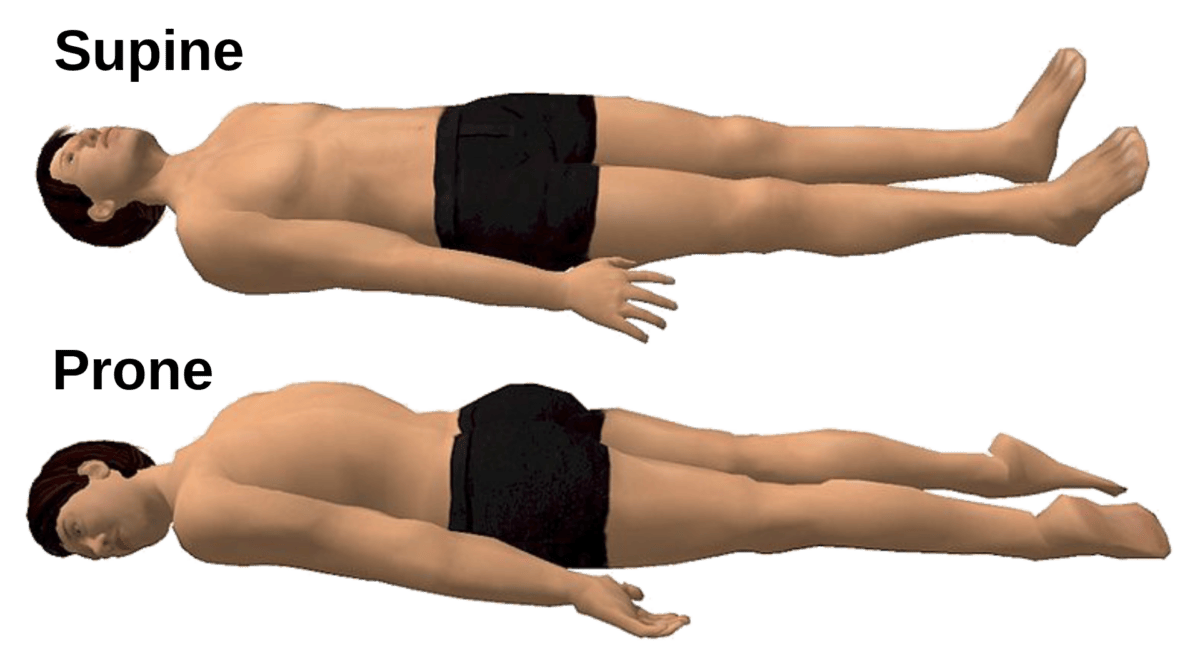
Supine and prone positions
Image: “Supine and prone positions” by Jmarchn. License: CC BY-SA 3.0Prone Position
In the prone position, the patient lies flat on their abdomen with their head facing downward. It is essentially the exact opposite of the supine position. If a patient cannot turn themselves, placing the patient into a supine position and using a “barrel roll” to get them on their stomach is often the easiest way to get them into a prone position. It’s also good to place a small pillow under the hips in order to keep proper spine alignment while in a prone position.
There are a few specific uses for the prone position:
- Acute respiratory distress syndrome (ARDS): Patients with severe ARDS may benefit from the prone position, as it improves oxygenation and reduces mortality risk. When an individual is on their stomach, their lungs have more room to expand, leading to deeper respirations and therefore improved oxygenation.
- Postural drainage: Prone positioning aids in postural drainage for patients with lung conditions, helping to clear mucus from the airways. Basically, we are trying to use gravity to our advantage.
- Pressure ulcer prevention: Patients with pressure ulcers on their sacrum or buttocks may be positioned prone to alleviate pressure on the affected area. This can help prevent further skin deterioration and allow for better visualization when tending to the wound.
Semi-Fowler’s Position
Semi-Fowler’s position is a supine position with the head of the bed at a 30- to 45-degree angle. It is probably the most common patient position of them all. To get your patient into a Semi-Fowler’s position, place them supine and simply elevate the head of the bed.
Here are just a few examples of when you’ll use a Semi-Fowler’s position:
- Respiratory support: Patients with respiratory distress may benefit from the Semi-Fowler’s position, as it promotes lung expansion and eases breathing.
- Feeding and swallowing: For patients at risk of aspiration, this position reduces the risk of choking during feeding.
- Postoperative recovery: After certain surgeries, patients may be placed in the Semi-Fowler’s position to reduce postoperative complications.
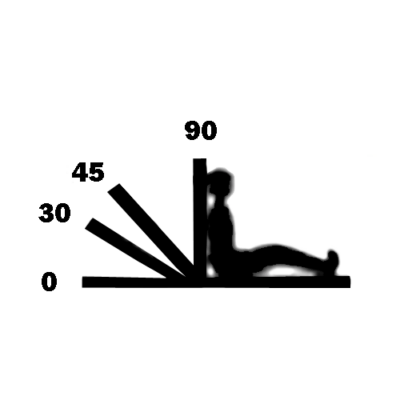
High Fowler’s: 90 degrees.
Semi-Fowler’s: 30–45 degrees.
High Fowler’s Position
The High Fowler’s position involves elevating the head of the bed to 90 degrees. This is why Semi-Fowler’s is called “semi,” because it is about half of what a High Fowler’s position is. So, to get your patient into a High-Fowler’s position, you’ll first put them supine in the bed, then raise the head of the bed to 90 degrees.
Tip: If your patient tends to slump to one side in a High-Fowler’s position, you can use pillows in between their shoulders and the bed rail on the favored side to keep them propped up!
So, when is a High-Fowler’s position used? While it shares some applications with the Semi-Fowler’s position, it has its own unique use cases:
- Respiratory distress: Patients with severe respiratory issues, such as acute respiratory distress syndrome (ARDS) or pulmonary edema, may be placed in the High Fowler’s position to optimize oxygenation.
- Cardiac care: The position is employed in cardiac emergencies to reduce the workload on the heart and improve cardiac output.
- Enteral feedings: High Fowler’s position is preferred during enteral feedings to minimize the risk of aspiration.
Trendelenburg Position
In the Trendelenburg position, the patient is usually in a supine position with the head lowered and the legs elevated at a 15 to 30-degree angle. The whole point of this position is to get the head lower than the heart.
As you might imagine, this actually rather uncomfortable position is used in very specific instances, including:
- Shock: In cases of severe hypotension and shock, the Trendelenburg position can help increase venous return and cardiac output. It also sends what blood is available to vital organs rather than extremities using gravity.
- Pelvic surgery: This position is employed during pelvic surgeries to improve visibility and access to pelvic organs.
- Assisting venous return: The Trendelenburg position may be utilized during certain procedures to facilitate venous blood flow.
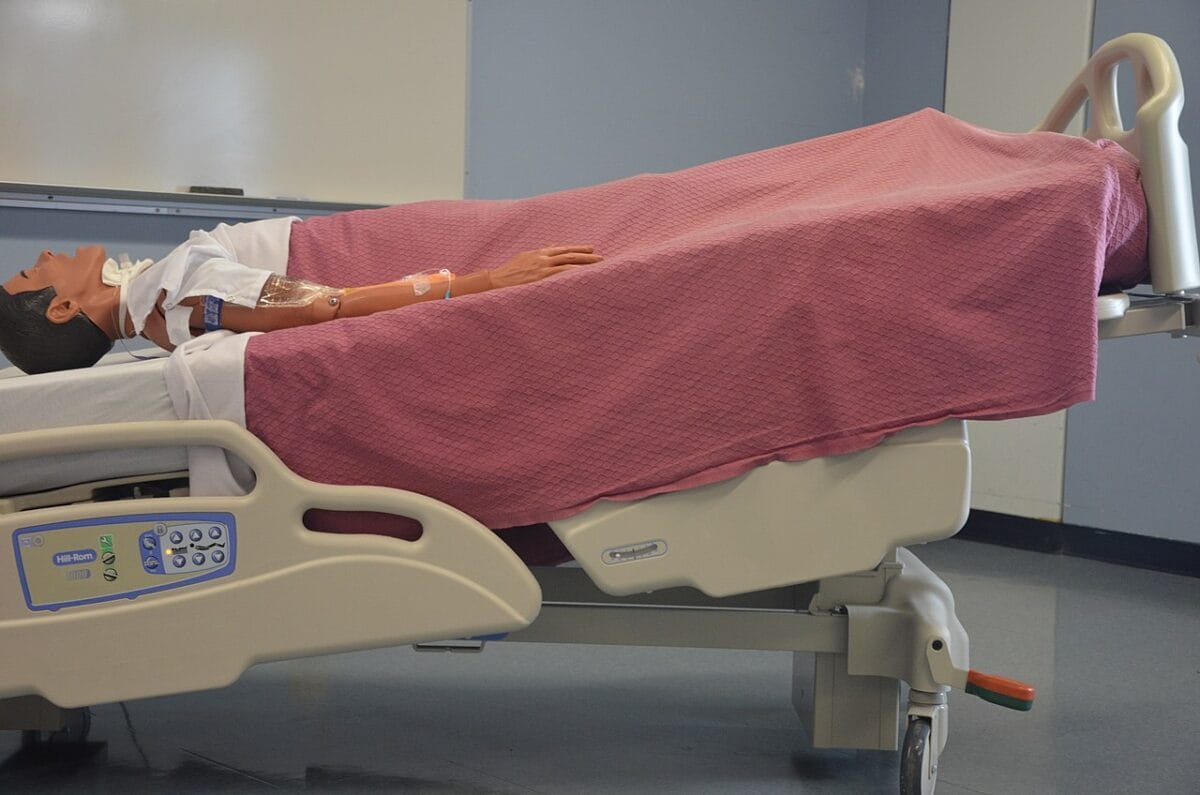
Medical mannequin placed in the Trendelenburg position
Image: “Trendelenburg” by Glynda Rees Doyle and Jodie Anita McCutcheon. License: CC BY 4.0Lithotomy Position
The lithotomy position involves placing the patient in a supine position, but with hips and knees flexed, thighs apart and drawn up towards the chest. You’ll usually have them scoot down to the bottom of the bed prior to assuming the position and you’ll want to either support the legs or put them into stirrups, as this position is hard for the patient to hold on their own for long.
You might have guessed when this one is most often used, but the two most common use cases are:
- Gynecological examinations: The lithotomy position provides unobstructed access to the pelvic area for gynecological examinations and procedures.
- Childbirth: During labor and delivery, this position allows for better visualization and accessibility for vaginal exams and procedures such as an amniotomy.
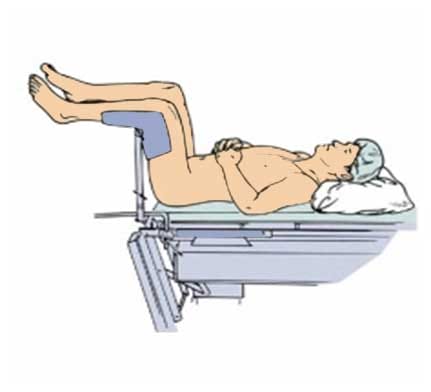
Lithotomy position
Image: “Lithotomy position” by Saltanat ebli. License: CC BY-SA 3.0Sim’s Position
In Sim’s position, the patient lies on their left side with the upper knee flexed and drawn into the torso and the lower knee slightly bent. This is another highly specific patient position that is used for:
- Rectal examinations: The Sim’s position provides easy access to the rectal area for examinations and procedures like a colonoscopy.
- Enema administration: For enema administration, Sim’s position is preferred to ensure efficient delivery and distribution of the solution.
Key Takeaways on Patient Positions in Bed
Bed positioning in nursing is one of the foundational skills that are essential for any nursing student or professional nurse to master.
By carefully considering when and how to use different patient positions, we, as nursing students, can ensure we are providing patient care that prioritizes comfort, respect, and dignity. Now that you have a good overview, it’s time to put your knowledge into practice by trying out some of these positions!
